SSM

SSM:

即是Spring SpringMVC Mybatis的开头字母
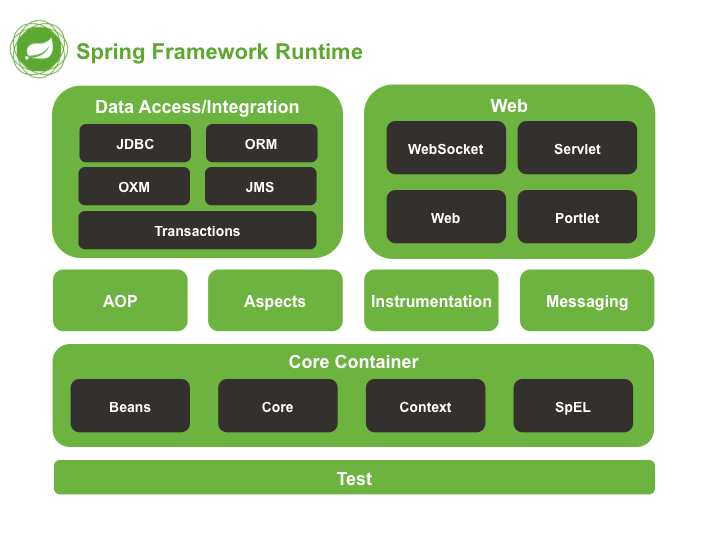
Spring

Spring Framework Runtime

SSM里的Spring其实主要常用的是IoC和Aop,还有Test

  • Spring默认的xml配置文件为 applicationContext.xml

Spring IoC

中文译名:控制反转/依赖注入,简单来说,即是原来的new xxx();用spring中content的bean代替,实现在构造函数的时候自动注入参数,有三种配置方式:基于xml,基于注解,基于java类,有三种注入方式:构造注入,set注入,工厂注入(不常用).

基于xml的配置

1
2
3
4
5
6
7
8
9
10
11
12
13
14
15
16
17
<!--标识符(identifiers)即bean的身份标识-->
<!--若不设定id与name,则以name-generator的规则命名,默认为小写开头的非限定类名-->
<!--若设定了id(一般情况),则id为标识符-->
<!--若没设定,则name的第一个字符串作为标识符-->
<bean id="info" name="informationX,name2" class="com.test.InformationX" />
<!-- <bean id="nameX" value="lester"> -->

<!--setter注入,human需要有setname()&setinfo()-->
<bean id="human" class="com.test.pojo.human">
<property name="name" value="lester" />
<property name="info" ref="info" />
</bean>

<!--构造注入,man需要有man(human h,int age)-->
<bean id="man" class="com.test.pojo.man">
<constructor ref="human" />
<constructor value="10">

基于注解的配置

1
2
3
4
5
6
7
8
9
10
11
12
13
14
15
16
17
18
19
20
21
22
23
24
25
26
27
@Component  //自动生成Bean. 与@Repository(用于DAO),@Service(用于Service),@Controller(用于Controller)作用相同
public class human{
@Autowired //@Resource,@Inject原生标准注解也能识别,作用也差不多
@Qualifier("info") //若不能自动识别即可指定注入内容
private InformationX infoX;
@Autowired //此处注解后无需setNameX函数了
private String nameX;
public human(){

}
//@AutoWired 即可在变量上进行注解(无需setter函数),也可在setter方法上进行注解
public void setNameX(String s){
this.nameX=s;
}
//@Required 若设置Required则表示此变量必须在xml配置文件中进行配置
public void setInfomationX(InfomationX x){
this.infoX=x;
}
//========================================================
// 也可以在构造函数上注入
@Autowired
public human(String s,@Qualifier("info")InfomationX x){
this.nameX=s;
this.infoX=x;
}
//========================================================
}

另外还要在Spring的xml配置文件中配置以使注解生效

1
2
3
4
5
6
7
8
9
10
11
12
13
14
<bean class="org.springframework.beans.factory.annotation.AutowiredAnnotationBeanPostProcessor"/> 
<!-- 使@Autowired可用" -->
<bean class="org.springframework.beans.factory.annotation.CommonAnnotationBeanPostProcessor"/>
<!-- 使Common(@Resource,@PostConstruct,@PreDestroy)可用(?) -->
<bean class="org.springframework.beans.factory.annotation.RequiredAnnotationBeanPostProcessor"/>
<!-- 使@Required可用" -->
<bean class="org.springframework.beans.factory.annotation.PersistenceAnnotationBeanPostProcessor "/>
<!-- 使@PersistenceContext可用(?)"
<!------------------或者--------------------->
<!-- 一条等于上面四条,但无法使用@Component,即还是要把这个类的bean配置一下,如在xml里配置 -->
<context:annotation-config />
<!-----------------或者---------------------->
<!-- 一条等于上面一条,并且可以使用@Component,从指定package开始递归扫描 -->
<context:component-scan base-package="com.test.pojo.human"/>

基于java配置类的配置

即是将xml配置文件里的配置提出来,放到一个java文件里,成为一个配置类.这样的好处即是不需要xml文件了,实现去xml化.

1
2
3
4
5
6
7
8
9
10
11
12
13
14
15
16
17
18
19
20
21
22
//btw spring boot里的@SpringBootApplication一条等于@Configuration,@EnableAutoConfiguration,@ComponentScan三条
//@ComponentScan("com.test.pojo.human")开启扫描
@Configuration
public class Configuration_or_somefckingothernamebutendwithConfig{
public void Configuration_or_somefckingothername(){

}
//@Bean("name2")
@Bean(name={"infoX","InformationX","name2"})
@Scope("singleton")//Bean的实例如何创建,生命周期
public InformationX info_or_others(){
return new InformationX();
}
@Bean
@Description("一些描述")
public human human_or_others(InformationX infoX,String n){
human a= new human();
human.setNameX(n);
human.setInformationX(infoX);
return a;
}
}

btw: Scope标识此bean的作用域,常在多线程问题中使用.

什么时候该在xml里定义bean什么时候该用扫描

  • 在xml里定义bean

    • 非常严谨需要一个个定义
    • 外部引入,无法修改的类
    • 我就是享受那种一个个定义的快感的时候
  • 不需要定义bean

    • 怕在xml中配置的时候手滑

Spring AOP

Aspect-Oriented Programming(AOP,面向切面的程序设计)是对于Object-oriented programming(OOP,面向对象程序设计)的一个改进.

我对于AOP的理解: 即hook住了一个类(要代理的类)中的函数,使得我们可以在函数的之前之后跑一段其他代码.SpringAOP使得获取到的对象(Bean)为代理后的而不是原有的.

btw:当代理类中的函数互相调用时,SpringAOP不会起作用.

通过继承接口实现的AOP

此处的接口指的是SpringAOP拦截器的接口,具体来说即继承org.springframework.aop下的函数:

  • MethodBeforeAdvice.before()
  • AfterReturningAdvice.afterReturning()
  • MethodInterceptor.invoke()
  • ThrowsAdvice的AfterThrowing()(ThrowAdvice并没有此接口,但是继承后的函数名依然要是AfterThrowing,原因)
1
2
3
4
5
6
7
8
9
10
11
12
13
14
15
16
17
18
19
public class xxxxHelper_or_u_want implements MethodBeforeAdvice,MethodInterceptor,AfterReturningAdvice {
@Override
public void before(Object o, Method method, Object[] objects, Object o1) {
System.out.println("在MethodInterceptor之前执行");
}
@Override
public Object invoke(MethodInvocation invocation) throws Throwable {
System.out.println("参数" + invocation.getArguments()[0] + "--执行函数" +
invocation.getStaticPart() + "--执行类" +
invocation.getThis().getClass() + "--执行函数" +
invocation.getMethod().getName());
Object ret=invocation.proceed();//真正执行方法,也就是说你可以搞事:D
System.out.println("环绕增强调用结束");
return ret;//可以修改函数返回值
}
@Override
public void afterReturning(Object o, Method method, Object[] objects, Object o1) {
System.out.println("在MethodInterceptor之后执行");
}

Spring的xml配置文件

1
2
3
4
5
6
7
8
9
10
11
12
13
14
15
16
17
18
19
20
21
22
23
24
25
26
27
28
29
30
31
32
33
34
35
36
37
38
39
40
41
42
43
44
45
46
47
48
49
50
51
52
53
54
55
56
<bean id="xxxxImpl" class="com.test.xxxxImpl">
<bean id="xxxxHelper"class="com.test.xxxxHelper_or_u_want">

<!---------------------------------------------------------------->
<!--JdkRegexpMethodPointcut的Patternc为一个正则表达式字符串组,定义了要注入的函数(切点)-->
<!--即Advice(通告?) -->
<bean id="xxxxAdvice" class="org.springframework.aop.support.JdkRegexpMethodPointcut">
<!-- <property name="pattern" value="fun_name" /> -->
<property name="patterns">
<list>
<value>fun_name</value>
</list>
</property>
</bean>
<!-- 关联切点(point)与实现接口的函数(advice)-->
<!-- 即Advisor(顾问?) -->
<bean id="xxxxCutAdvisor" class="org.springframework.aop.support.DefaultPointcutAdvisor">
<property name="advice" ref="xxxxHelper" />
<property name="pointcut" ref="xxxxAdvice" />
</bean>
<!-----------------------------或者-------------------------------->
<!-- 一句等于上面两句 -->
<bean id="xxxxCutAdvisor" class="org.springframework.aop.support.RegexpMethodPointcutAdvisor">
<property name="pattern">
<value>fun_name</value>
</property>
<property name="advice">
<ref bean="xxxxHelper"/>
</property>
</bean>
<!----------------------------------------------------------------------->

<!----------------------------------------------------------------------->
<!-- proxy(代理) -->
<!-- 在代码实际运行时通过proxy创建代理对象从而实现AOP -->
<bean id="proxy" class="org.springframework.aop.framework.ProxyFactoryBean">
<property name="target" ref="xxxxImpl" />
<property name="interceptorNames" value="xxxxCutAdvisor" />
<!-- 接口,不写则直接代理指定类(当然不推荐),写了通过接口代理指定类 -->
<property name="proxyInterfaces" value="com.test.xxxx" />
</bean>
<!--------------------------或------------------------------------------>
<!-- 一句等于上面的配置, 使得上面的target可以使用通配符-->
<bean class="org.springframework.aop.framework.autoproxy.BeanNameAutoProxyCreator">
<property name="beanNames" value="*_name,some*,xxxxImpl"/>
<property name="interceptorNames">
<list>
<value>xxxxCutAdvisor</value>
</list>
</property>
</bean>
<!---------------------------或-------------------------------------->
<!-- 一句等于上面的配置, 自动扫描 -->
<!-- 若未匹配则不代理 -->
<bean class="org.springframework.aop.framework.autoproxy.DefaultAdvisorAutoProxyCreator" />
<!----------------------------------------------------------------------->

通过xml来配置(AspectJ)

此种方法相比较第一种方法的最大区别即是不用继承接口.

1
2
3
4
5
6
7
8
9
10
11
12
13
14
15
16
public class xxxxHelper_or_u_want {
public void before_or_dsoiafd() {
System.out.println("在MethodInterceptor之前执行");
}
public Object around_or_aisfad(ProceedingJoinPoint invocation) throws Throwable{
System.out.println("参数" + invocation.getArguments()[0] + "--执行函数" +
invocation.getStaticPart() + "--执行类" +
invocation.getThis().getClass() + "--执行函数" +
invocation.getMethod().getName());
Object ret=invocation.proceed();//真正执行方法,也就是说你可以搞事:D
System.out.println("环绕增强调用结束");
return ret;//可以修改函数返回值
}
public void after_or_sajdoip() {
System.out.println("在MethodInterceptor之后执行");
}

Spring的xml配置文件

1
2
3
4
5
6
7
8
9
10
11
12
13
14
15
<bean id="xxxxHelper" class="com.test.xxxxHelper_or_u_want">
<aop:config>
<aop:aspect ref="xxxxHelper">
<!-- 定义切点 -->
<!-- expression内的是AspectJ表达式 -->
<aop:pointcut id="init_cutpoint" expression="execution(public com.test.xxxx.fun_name(..))"/>
<!-- 前置通知 -->
<aop:before pointcut-ref="init_cutpoint" method="before_or_dsoiafd"/>
<!-- 后置通知 -->
<aop:after pointcut-ref="init_cutpoint" method="after_or_sajdoip"/>
<!-- 环绕通知 -->
<!--也可以直接写AspectJ表达式-->
<aop:around pointcut="execution(* com.test.xxxx.fun_name(..))" method="around_or_aisfad"/>
</aop:aspect>
</aop:config>

通过注解来配置(AspectJ)

1
2
3
4
5
6
7
8
9
10
11
12
13
14
15
16
17
18
19
20
21
22
23
24
25
@Aspect//使得Spring可以自动扫描
public class xxxxHelper_or_u_want {
@Pointcut("execution(public com.test.xxxx.fun_name(..))")//括号内的都是AspectJ表达式
public void init_cutpoint(JoinPoint joinPoint) {
System.out.println(joinPoint.getSignature().getName());
}

@Before("init_cutpoint()")
public void before_or_dsoiafd() {
System.out.println("在MethodInterceptor之前执行");
}
@Around("init_cutpoint()")
public Object around_or_aisfad(ProceedingJoinPoint invocation) throws Throwable{
System.out.println("参数" + invocation.getArguments()[0] + "--执行函数" +
invocation.getStaticPart() + "--执行类" +
invocation.getThis().getClass() + "--执行函数" +
invocation.getMethod().getName());
Object ret=invocation.proceed();//真正执行方法,也就是说你可以搞事:D
System.out.println("环绕增强调用结束");
return ret;//可以修改函数返回值
}
@After("init_cutpoint()")
public void after_or_sajdoip() {
System.out.println("在MethodInterceptor之后执行");
}

Spring的xml配置文件

1
2
3
4
<aop:aspectj-autoproxy /><!-- 扫描@Aspect -->
<!-- 更懒一些还可以选择@Component :D -->
<bean id="xxxxImpl" class="com.test.xxxxImpl">
<bean id="xxxxHelper" class="com.test.xxxxHelper_or_u_want">

AspectJ表达式

AspectJ表达式通配符

符号 作用
*** 匹配任何数量的字符
.. 匹配任何数量的任何数量的字符,换句话说即匹配任何数量的***
+ 跟在类后面,表示此类的子类(不包含其本身)
  • 对于简单的例子
    • execution(public com.test.xxxxImpl.fun_name(..)))
参数 作用
public public类型
com.test.xxxxImpl 包名
. 连接包名与函数(方法)名
fun_name 函数(方法)名
(..) 所有参数

那么可以推出

表达式 作用
execution(public com.test.xxxxImpl.fun_name(..))) 任意参数的public的com.test.xxxImple.fun_name函数
execution(public com.test.xxxx+.fun_name(..))) 任意参数的public的实现了com.test.xxx的fun_name函数的函数
execution(public com.test.xxxx+.(..)))* 任意参数的public的实现了com.test.xxx的任何函数的函数
execution( com.test.xxxx+.(..))) 任意参数的任意类型的实现了com.test.xxx的任何函数的函数
execution(public com.test.(..)))* 任意参数的public的com.test包下的任何类(com.test.*)的任何函数
execution(public com.test..(..)))* 任意参数的public的com.test./com.test..*的任何函数

Test

配置log4j后,使用context.getBean()获取Bean,调用类中的函数

SpringMVC

SpringMvc(全称Spring Web MVC,位于spring-webmvc.jar)通过一个叫做DispatcherServlet的Servlet来获取 ModelAndView 来传递内容,并在View(一般是.jsp)中将Model渲染出来从而生成web页面.

btw: Spring5中引入了一个新的web框架Spring-webflux

SpringMVC与Servlet容器(如Tomcat)的配置

有多个Servlet的配置

  • 需要配置*[Servlet-name]-serlvet.xml*

web.xml中配置DispatcherServlet即可,就如其名,它是个Servlet,他将url-pattern中的请求转发到关联的的serlet-name中,这样的好处即是可以将多个ServletBean分离(或者说是每个ServletWebApplicationContext),互不影响.

web.xml下进行如此配置

1
2
3
4
5
6
7
8
9
10
11
12
<web-app>
<servlet>
<servlet-name>servlet_name</servlet-name>
<servlet-class>org.springframework.web.servlet.DispatcherServlet</servlet-class
>
<load-on-startup>1</load-on-startup>
</servlet>
<servlet-mapping>
<servlet-name>servlet_name</servlet-name>
<url-pattern>/example/*</url-pattern>
</servlet-mapping>
</web-app>

即配置*/example/下的所有请求都被名叫servlet_name的servlet处理(具体配置文件为/WEB-INF/servlet_name-servlet.xml)

当然也有用java配置类的方法,只需要继承org.springframework.web下的WebApplicationInitializer接口即可

1
2
3
4
5
6
7
8
9
10
@Configuration
public class MyWebApplicationInitializer implements WebApplicationInitializer {
@Override
public void onStartup(ServletContext container) {
ServletRegistration.Dynamic registration = container.addServlet("servlet_name",
new DispatcherServlet());
registration.setLoadOnStartup(1);
registration.addMapping("/example/*");
}
}

仅有单个Servlet的配置(特殊)

  • 仅需要配置applicationContext.xml

如果仅有一个Servlet,那么可以将将所有请求拦截,然后交由Spring的ApplicationContext(或者说RootWebApplicationContext)处理.

在web.xml下进行如下配置

1
2
3
4
5
6
7
8
9
10
11
12
13
14
15
16
17
18
19
20
21
22
23
24
25
<web-app>
<!-- 可以折么修改applicationContext.xml的名字 -->
<!-- <context-param>
<param-name>contextConfigLocation</param-name>
<param-value>/WEB-INF/root-context.xml</param-value>
</context-param> -->
<servlet>
<servlet-name>dispatcher</servlet-name>
<servlet-class>org.springframework.web.servlet.DispatcherServlet</servlet-class
>
<!-- 也可以这么修改applicationContext.xml的名字 -->
<!-- <init-param>
<param-name>contextConfigLocation</param-name>
<param-value></param-value>
</init-param> -->
<load-on-startup>1</load-on-startup>
</servlet>
<servlet-mapping>
<servlet-name>dispatcher</servlet-name>
<url-pattern>/*</url-pattern>
</servlet-mapping>
<listener>
<listener-class>org.springframework.web.context.ContextLoaderListener</listener-class>
</listener>
</web-app>

btw: 除了ContextLoaderListener,还有ContextLoaderServlet的实现

SpringMVC的Controller

基于注解的配置

IndexController.java(在com.test)

1
2
3
4
5
6
7
8
9
10
11
@Controller // 类似于@Component但是是由springmvc解析
@RequestMapping("/") //指定此Controller绑定到 '/'路径
public class IndexController {

@RequestMapping(method = RequestMethod.GET)//指定此函数方法绑定的是get方法
public String index(ModelMap model){
model.addAttribute("message", "Spring MVC XML Config Example");
return "index";//使用了(@Response)Mapping而不是(@Response)Body所以去寻找index的view
}

}

index.jsp(在*/WEB-INF/views/*下)

1
<p>${message}</p>

servlet_name-servlet.xml

1
2
3
4
5
6
7
8
9
10
11
12
13
<!-- 拦截所有请求时,需要此配置来使@Controller获得比<mvc:default-servlet-handler/> 更高的优先级 -->
<mvc:annotation-driven />
<!-- 默认处理 -->
<mvc:default-servlet-handler/>
<!-- <context:annotation-config/> 见上面Spring部分 -->
<context:component-scan base-package="com.test" />

<!-- 视图解析器,为返回的字符串添加前缀与后缀 -->
<bean class="org.springframework.web.servlet.view.InternalResourceViewResolver">
<property name="viewClass" value="org.springframework.web.servlet.view.JstlView"/>
<property name="prefix" value="/WEB-INF/views/" />
<property name="suffix" value=".jsp" />
</bean>

此时访问http://localhost:8080/example/*即可看到由*IndexController传递message给*/WEB-INF/views/index.jsp*并显示的页面

  • Controller中的model的区别

Model|特点|使用|返回
–|–|–|–|–
ModelMap|由Spring自动创建|作为函数方法的参数接受,并使用addAttribute传递参数|返回String
ModelAndView|自己手动创建|使用new来创建,并使用addObject传递参数|返回Model

  • 返回字符串的关键字
String 作用
forward: 服务器转发
redirect: 客户端转发

基于xml的配置

java继承并重写Controller(org.springframework.web.servlet.mvc)handleRequest函数即可

1
2
3
4
5
6
7
public class IndexController implements Controller {

public ModelAndView handleRequest(HttpServletRequest req,
HttpServletResponse res)
throws Exception {
return new ModelAndView("index");
}

index.jsp不变

servlet_name-servlet.xml

1
2
3
4
5
6
7
8
9
10
11
<!-- 因为id不能包括'/' -->
<!-- 而DispatcherServlet注册的BeanNameUrlHandlerMapping需要以'/'开头 -->
<!-- 所以只能设置为name别名 -->
<bean name="/" class="com.test.IndexController" />

<!-- 视图解析器,为返回的字符串添加前缀与后缀 -->
<bean class="org.springframework.web.servlet.view.InternalResourceViewResolver">
<property name="viewClass" value="org.springframework.web.servlet.view.JstlView"/>
<property name="prefix" value="/WEB-INF/views/" />
<property name="suffix" value=".jsp" />
</bean>

基于java配置类的配置

参见Srping部分

即是*@Configuration* ,@ComponentScan 和*@Bean* 等的使用

RESTFul

RESTFul,即符合REST(Representational State Transfer) principles的系統,通常用来做api,使用json(大多数)或xml通过http的方法来传递参数

我的理解即是视任何东西为对象,用各种http方法(PUT,GET,DELETE,PATCH等)来标识作用,真正要用的时候查查github的Api看看怎么写的照猫画虎就OK 😂

SpringMVC中使用*@RequestMapping*,@PathVariable,@RequestBody和*@ResponseBody来方便的实现RESTFul*

注解 作用
@RequestMapping 绑定Controller到指定路径(api的)
@PathVariable 标识路径中的变量与函数方法参数的关系
@RequestBody 用来获取传入的数据(json/xml)
@ResponseBody 用来直接返回数据而不是调用model
  • Example:
    1
    2
    3
    4
    5
    6
    7
    8
    9
    10
    11
    12
    13
    14
    15
    16
    17
    18
    19
    @Controlle
    public class TestController {

    @RequestMapping(value="/postJson",method = RequestMethod.POST)
    public String index(@RequestBody Id_And_Name ian){
    StringBuffer sb=new StringBuffer("");
    sb.append(ian.id);
    sb.append("---->");
    sb.append(ian.name)
    model.addAttribute("message", sb.toString());
    return "index";
    }
    @RequestMapping(value="/getJson/{id}",method = RequestMethod.GET)
    public @ResponseBody Id_And_Name index(@PathVariable int uid){
    Id_And_Name ian=new Id_And_Name().get_name_by_id(uid)
    return ian;
    }

    }

btw: RPC就是使用二进制,而不是http,实现不同系统间相互通信

Mybatis

Mybatis(ibatis)

他通过SqlSession(由SqlSessionFactory创建)来执行(Excutor())各种操作

我个人感觉折腾这个比折腾hibernate麻烦(当然是在使用Intellij IDEA的情况下)

Mybatis配置

配置环境

  • 通过mybatis-config.xml来进行配置坏境

    1
    2
    3
    4
    5
    6
    7
    8
    9
    10
    11
    12
    13
    14
    15
    16
    17
    <configuration>
    <!-- 引入.properties文件,使得可以在下面的配置中引用 -->
    <!-- db.properties文件中有jdbc.password=toor等 -->
    <properties resource="db.properties">
    <environments default="development">
    <environment id="development">
    <!-- 采用jdbc的事务管理 -->
    <transactionManager type="JDBC"/>
    <dataSource type="POOLED">
    <property name="driver" value="com.mysql.jdbc.Driver" />
    <property name="url" value="jdbc:mysql://localhost:3306/test" />
    <property name="username" value="root" />
    <property name="password" value=${jdbc.password} />
    </dataSource>
    </environment>
    </environments>
    </configuration>

    选择的数据表每条数据包含id,username,password内容

    实体类User(com.test.entity)

    1
    2
    3
    4
    5
    6
    public class User{
    int id;
    String username;
    String password;
    // set,get方法略
    }

配置数据库方法

  • 仅使用xml文件配置

  • mybatis-config.xml

    1
    2
    3
    4
    5
    6
    <configuration>
    <mappers>
    <!-- 引用具体的mapper文件 -->
    <mapper resource="com/test/mapper/UserMapper.xml" />
    </mappers>
    </configuration>
  • 被引用的UserMapper.xml文件

    1
    2
    3
    4
    5
    6
    7
    8
    9
    10
    11
    12
    13
    14
    15
    16
    17
    18
    19
    20
    21
    <!-- namespace的值习惯上设置成包名+sql映射文件名 -->
    <mapper namespace="com.test.mapper.UserMapper">
    <select id="selectUserById" parameterType="int" resultType="user">
    select * from user where id=#{id}
    <if test="name !=null">
    and name=#{name}
    </if>
    </select>
    <select id="selectUserListByName" parameterType="string" resultType="user">
    select * from user where username=#{name}
    </select>
    <insert id="saveUser" parameterType="user">
    insert into user values(#{username},#{password})
    </insert>
    <delete id="deleteUserById" parameterType="int">
    delete from user where id=#{id}
    </delete>
    <update id="udpateUserById" parameterType="user">
    update user set username=#{username} where id=#{id}
    </update>
    </mapper>
  • 或者使用Mapper代理方式(写个接口)的方式配置

    • UserMapper.java

      1
      2
      3
      4
      public interface UserMapper {
      public User selectUserById(int id);
      public int deleteUserById(int id);
      }

      mybatis-config.xmlUserMapper.xml文件不变

      1. UserMapper.xml中的namespace等于mapper接口地址

      2. 接口中的函数方法名与xml中的statemen的id一致

      3. 输入输出的类型要一致

  • 或者直接在Mapper接口上进行注解

    • UserMapper.java
      1
      2
      3
      4
      5
      6
      public interface UserMapper {
      @select("select * from user where id=#{id}")
      public User selectUserById(int id);
      @Delete("delete from user where id=#{id}")
      public int deleteUserById(@Param("id") int uid);
      }
    • UserMapper.xml
      1
      2
      3
      4
      5
      6
      <configuration>
      <mappers>
      <!-- 引用mapper的class -->
      <mapper class="com.test.mapper.UserMappe" />
      </mappers>
      </configuration>
  • 另外,使用typeAliases可设置别名从而精简书写量

    1
    2
    3
    4
    5
    6
    7
    8
    <configuration>
    <typeAliases>
    <!-- 手动 -->
    <typeAlias type="com.test.entity.User" alias="user"/>
    <!-- 自动,以首字母小写的非限定类名来作为它的别名-->
    <package name="com.test.mapper.UserMapper"/>
    </typeAliases>
    </configuration>
mapper 特点
resource xml文件
class 接口上注解

使用Spring管理Mybatis

这里的管理指的是

  • 数据源
  • sqlSession
  • Mapper

Spring-context.xml

1
2
3
4
5
6
7
8
9
10
11
12
13
14
15
16
17
18
19
20
21
22
<!-- 数据源 -->
<!-- 或者 com.mchange.v2.c3p0.ComboPooledDataSource 什么的-->
<bean id="dataSource" class="org.springframework.jdbc.datasource.DriverManagerDataSource">
<property name="driverClassName" value="com.mysql.jdbc.Driver"/>
<property name="url" value="jdbc:mysql://localhost:3306/test"/>
<property name="username" value="root"/>
<property name="password" value="toor" />
</bean>
<!-- sqlSession(Factory) -->
<bean id="sqlSessionFactory" class="org.mybatis.spring.SqlSessionFactoryBean">
<property name="dataSource" ref="dataSource"/>
</bean>
<!-- Mapper -->
<!-- 手动 -->
<bean id="userMapper" class="org.mybatis.spring.mapper.MapperFactoryBean">
<property name="mapperInterface" value="com.test.mapper.UserMapper" />
<property name="sqlSessionFactory" ref="sqlSessionFactory" />
</bean>
<!-- 自动 -->
<bean id="MapperScannerConfig" class="org.mybatis.spring.mapper.MapperScannerConfigurer">
<property name="basePackage" value="com.test.mapper"/>
</bean>

这样搞完后,只需要

  • 写好DAO层调数据库的接口,并写好操作数据库的sql语句(xml/注解),自动注入Mapper的配置
  • Service层中配置SqlSession类型的变量,即可注入sqlSession,调用DAO层的接口
  • Controller层调用Service层的方法,并使得SpringMVC可以传递输入输出数据
  • Tomcat等Servlet容器在启动之后将特定的数据传递到SpringMVC
  • 浏览器将其转换成从Tomcat或其他http服务器获得数据,展示给用户

分页

使用阿里巴巴的pagehelper即可,有中文文档

一对多,多对一,多对多

在实体类中设置某其他实体类变量即可实现多对多的功能

Mybatis Generator

maven中添加*mybatis-generator-maven-plugin(org.mybatis.generator)*插件

可自动生成mybatis所需的各种文件

1
2
3
4
5
6
7
8
9
10
11
12
13
14
15
16
17
18
19
20
21
22
23
24
25
26
27
28
29
30
31
32
33
34
35
36
37
38
39
40
41
42
<?xml version="1.0" encoding="UTF-8" ?>
<!DOCTYPE generatorConfiguration PUBLIC
"-//mybatis.org//DTD MyBatis Generator Configuration 1.0//EN"
"http://mybatis.org/dtd/mybatis-generator-config_1_0.dtd" >
<generatorConfiguration>

<classPathEntry location="(jdbc驱动路径)"/>

<context id="context" targetRuntime="MyBatis3Simple">
<commentGenerator>
<property name="suppressAllComments" value="false"/>
<property name="suppressDate" value="true"/>
</commentGenerator>

<!-- jdbc连接信息 -->
<jdbcConnection userId="" password="" driverClass="" connectionURL=""/>

<javaTypeResolver>
<property name="forceBigDecimals" value="false"/>
</javaTypeResolver>

<!-- Model构造器 -->
<javaModelGenerator targetPackage="" targetProject=".">
<property name="enableSubPackages" value="false"/>
<property name="trimStrings" value="true"/>
</javaModelGenerator>

<!-- mapper.xml构造器 -->
<sqlMapGenerator targetPackage="" targetProject=".">
<property name="enableSubPackages" value="false"/>
</sqlMapGenerator>

<!-- mapper接口构造器 -->
<javaClientGenerator targetPackage="" type="XMLMAPPER" targetProject=".">
<property name="enableSubPackages" value="false"/>
</javaClientGenerator>

<!-- 指定表(table) -->
<table schema="" tableName="" enableCountByExample="false" enableDeleteByExample="false"
enableSelectByExample="false" enableUpdateByExample="false"/>
</context>
</generatorConfiguration>

参考链接

官方文档 😂

详解 Spring 3.0 基于 Annotation 的依赖注入实现

Spring 框架的 AOP - Spring 教程 - 极客学院 Wiki

MyBatis xml 和 dao 层接口组合使用